
Although this is a fashion blog, my sweet friend Kellyann (This Blonde's Shopping Bag) suggested that this might be a good post to share, I hope she's right!
The challenge began several years ago. A friend that I had made when I first moved to FL reconnected with me (we had not kept in touch after she started working full time). It was right around the same time that I opened my furniture consignment store in 2013. Since the store opened at 10 a.m., I suggested we meet once a week for coffee at Starbucks. Thus began our 8-9:30 a.m. weekly meet up which has continued, so doing the math, we are somewhere in our our sixth year. Wow! As a side note--it's the most cost-effect therapy there is--girl time!
(Warning: This is a crazy-long post, you may want to skip ahead and look at the pictures first-LOL!)
The colors were kept in line with Starbucks's, so brown/red/green/gold were used. Because of the natural look of the band, burlap and twine accents were enlisted. I wanted the branding portions to be apparent and tried to leave words and logos uncovered. Not much went to waste, as even the generic white plastic lids were used.
The Details
The trio of trees that are decorated, below, are roughly 1 ft., 2 ft and 3 ft. in height (30 cm, 60 cm, 90 cm). The ornaments are numbered from the collages, also below, so the details can be described.
1. Corregated Winter Owl using the band cut into strips, rolled and glued. Bead eyes, green ribbon scarf.
2. A Gold Star using the spines of the cups trimmed a bit, glued and spray painted gold, there are only a couple of these. The red spirals are made from the lip of the cup, threaded over large Dollar Tree wire and twisted around a wooden spoon handle, painted red.
3. Christmas Tree & Bird Diorama. This photo appears twice, so the left and right ornaments are addressed here, and the lower one in #8. Left: Christmas tree using the spine painted brown, the branches are sliced band of the mermaid, edges inked green. Topper star die cut with glue applied around the words and then glitter added. Right: Bird Diorama uses the bottom approx. 1" of a cup (cut off with utility knife), outside and inside edges glittered, inside a die cut of a book page was used. The leaves and twigs were die cut from cardstock, the bird was hand cut using the band, then inked with red, the nest is narrow strips of a coffee liner, crumpled up. Pipe cleaner was glued around the rough-cut edge.
4. Victorian Christmas Cone. I think this is my favorite! I really like cones (for a few years my kids had large toile-covered cones instead of Christmas stockings--they preferred the stockings!). The band was used to make the cone. In it was placed more of the coffee filter "grass", a small rolled scroll of a computer printout of a Christmas carol tied with bakers' twine, some milliner's berries (found on Etsy), another die cut star (the same as with the Christmas tree) with the "Starbucks" words cut off the cup like a banner and the edges inked, glued over top of the star.
5. A classic folded star. Random portions of the cups were hand cut into a star shape, then creased and spray painted gold. The folds were intentionally scraped, so the words would be revealed. These were the fastest because there was no glueing or added elements. The red dot garland is made from 1" punches from the cups and glued over twine.
6. Ruffled Coffee Filter Mermaid. This is the first ornament I thought of. It's cutting the mermaid from the front of the cup, adding ruffled coffee filters and a pipe cleaner ring. I cropped the photo this way to also include, what is supposed to be a crown star tree topper, in the upper left corner. It is made using the base of a cup, cut with points with a center star (it's hard to see), the flat bottom was cross cut to stick on a top branch, spray painted gold. Also pictured as the tree topper on smallest tree in first photo, below.
7. Coffee Bean Ball. Easy peasy, styrofoam ball spray painted brown, glued with whole coffee beans, sprayed with varnish, twine added. Not from trash, but still a nice addition.
8. Encircled Mermaid Angel. Lower center. Upper drinking rim cut off and wrapped with twine. Wings cut from corrugated band, inked white, mermaid face ringed with pipe cleaner.
9. Poinsettia. The "big kahuna" one, was made using Tim Holtz's tattered leaves die. The pieces were curved by hand. (Tutorial on youtube.) The green petals were inked, pearls added to center. There are alligator clips on the back, although they don't stay hot glued on very well. There were fewer made of these because they are quite big and a resource hog.
Other:
- The white snowflake garland that you see in 1, 3, 4 and 8 is made from the plastic lids. They were cut with a snowflake die, white glitter added and glued to twine.
- There's also an ornament that you can just see the tassel bottom in #7 and in the root ball photo, cork tasseled mermaid. It is the band mermaid face wrapped around a wine cork with a red-twine tassel bottom.
- In the root bag photo, there are round mermaid bulbs on bottom of the left tree made with three cup mermaid cutouts folded in half and glued together. I tried to glitter the edges, but it didn't stay well.
- Root bags. The base of these trees is just a flat metal square. I went round and round about what to do with these and ended up using leftover ivory burlap and made root bags stuffed with plastic grocery bags, tied with a cup cutout.
- Coffee bean sack runner. Best seen in the root bags photo. Made using burlap, with a custom-cut stencil inspired by the wall art (pictured in the top right of below collage) in our local Starbucks with ripped muslin strip fringe.
The Takeaway
I guess I have to admit I'm the crafty sort. When my creative juices get flowing, they really go for it. Although it appears that I did nothing but craft on this all year, it wasn't that bad. The ornaments are small, I'd work on them here and there. My store would routinely be slow at certain times, so I'd work on them there, as well. I generally made ten of each then moved on.
While this may appear a


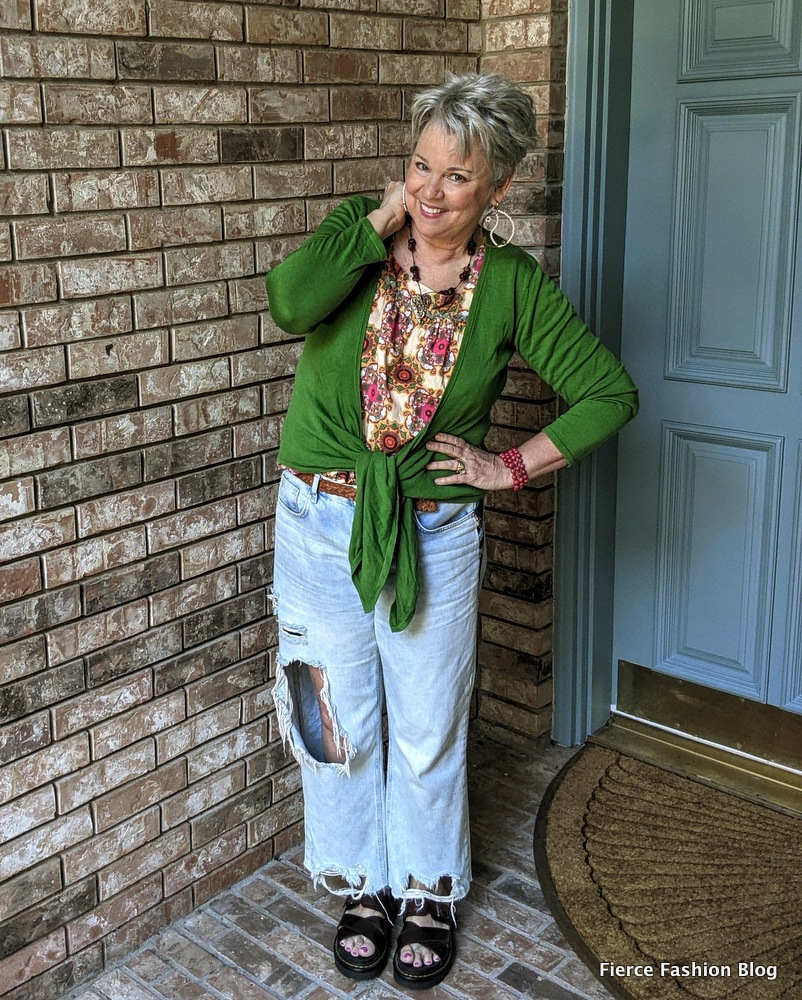
Outfit Details

Please consider Following my blog via BlogLovin', Instagram, Email or Pinning! Your comments make my day!
Linking with: On the Edge of the Week, Not Dressed as Lamb, Top of the World Style, Welcome to the Weekend Blog Hop, Fashion Should be Fun, Chic and Stylish, Start the Week Stylish, Creative Monday's Blog Hop, How I Summer, Visible Monday, Style with a Smile, Shoe and Tell Fashion Link Up, Nancy's Fashion Style, Turning Heads Tuesday, Restyle Tuesday, Style Splash, Ageless Style LinkUp


No comments